Shopify Integration Guide - Admin API (6 Steps ~ 2 minutes)
Follow these steps to connect Asa to your Shopify account using a custom app with Admin API access. This setup lets Asa learn from your product listings, metafields, blogs, pages, and store policies.
Step 1: Create a Custom App in Shopify
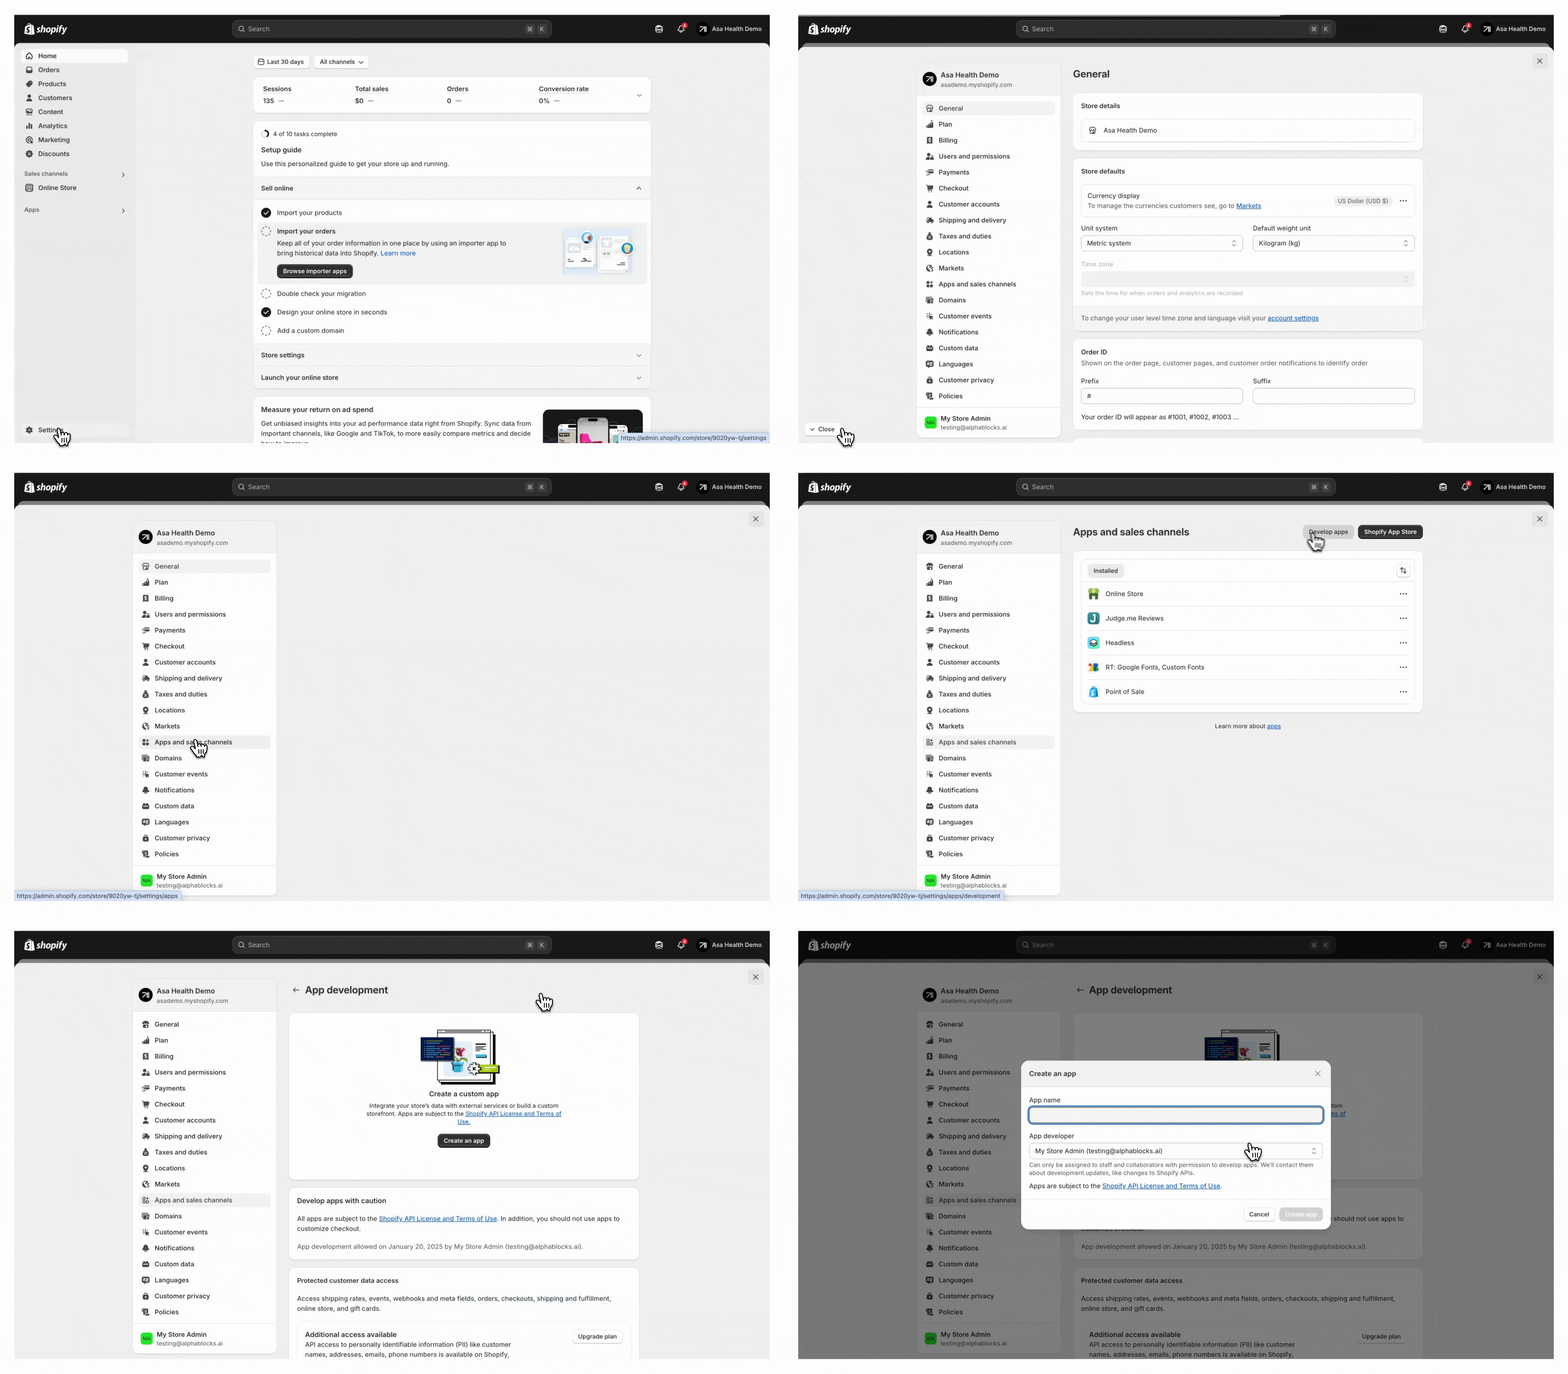
- In your Shopify dashboard, go to Settings > Apps and Sales Channels > Develop Apps
- Click Create App
If you can’t access the Develop Apps section, you may not have the required permissions. Check Shopify’s guide or contact your store admin. If you’re still having trouble, feel free to reach out to us at help@alphablocks.ai.

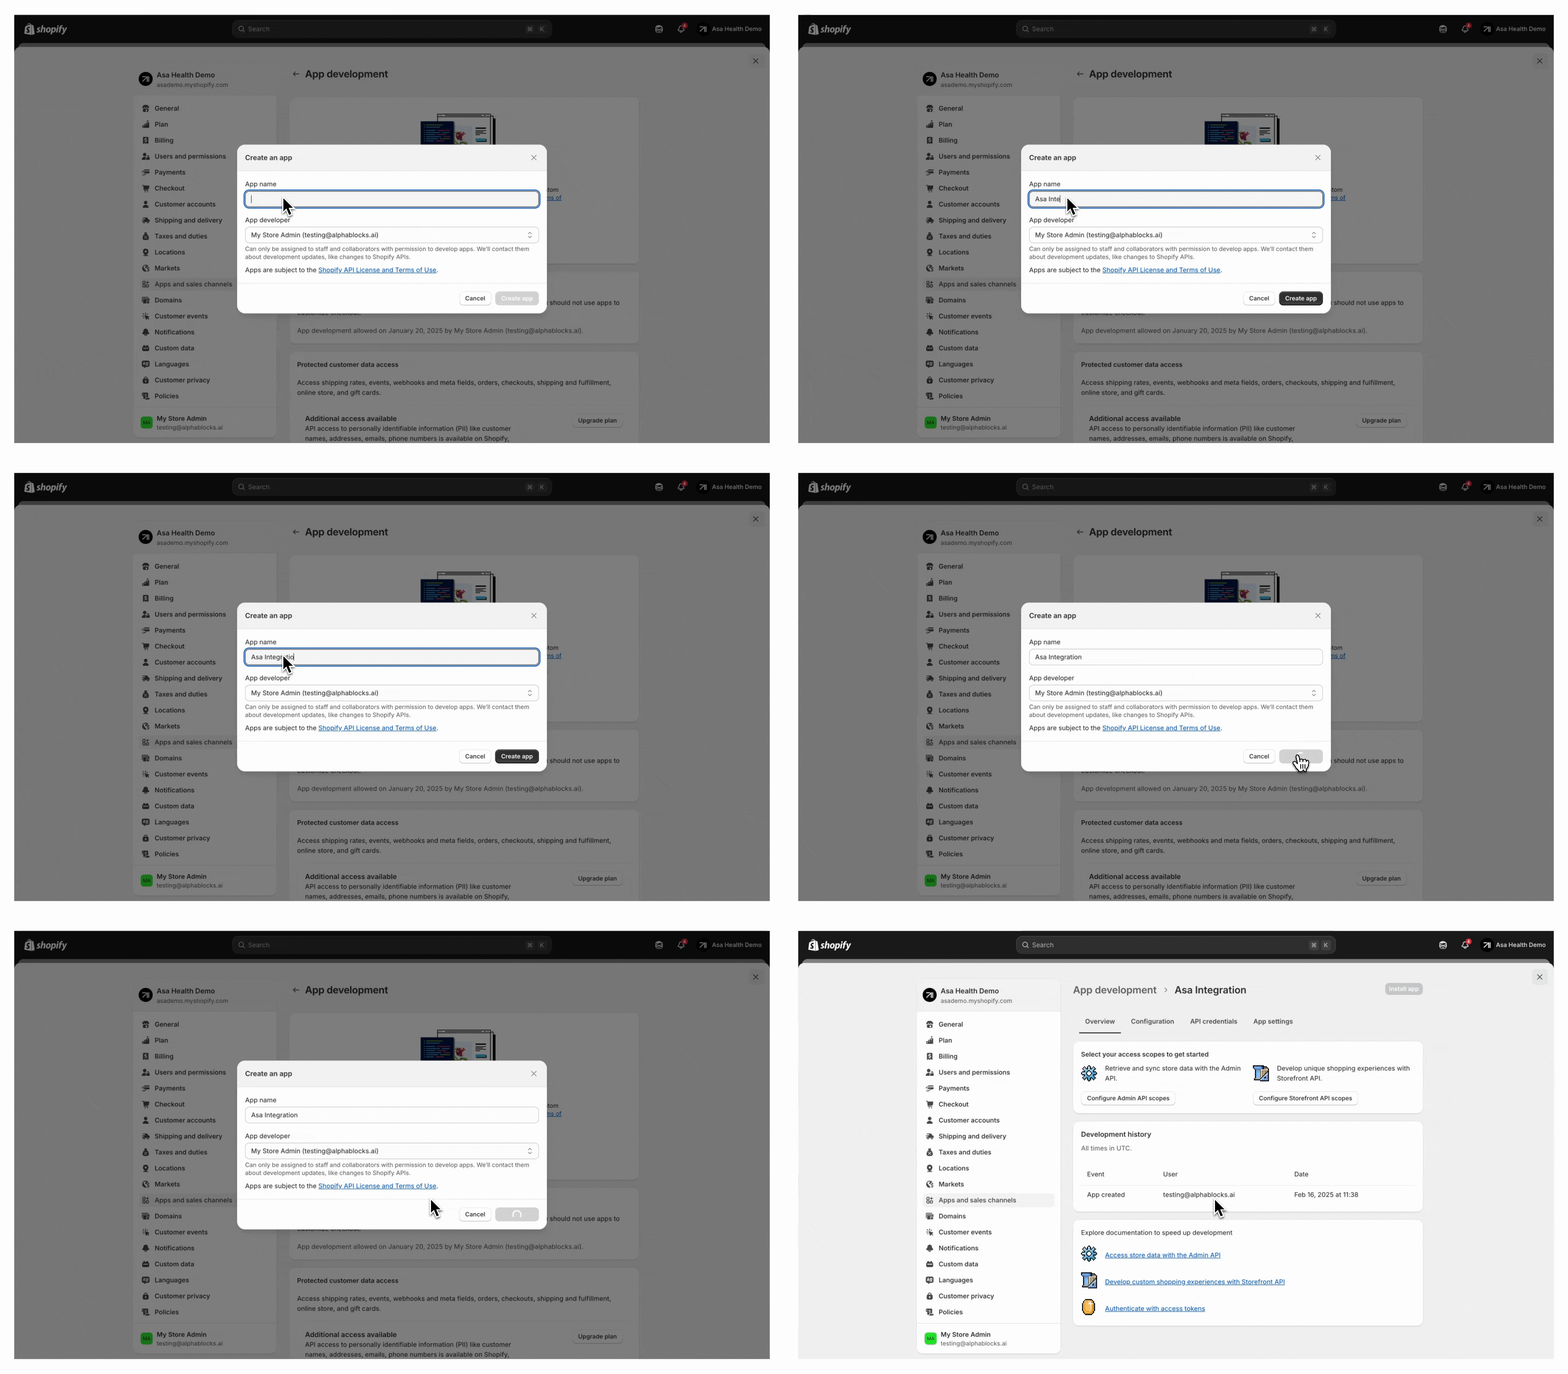
Step 2: Name Your App
- Name your app "Asa Integration"
- Click Create App

Step 3: Configure Admin API Access
- Go to the Configuration tab
- Click Configure next to Admin API Integration
- Select the following scopes:
- read_metaobjects,
- read_legal_policies,
- read_customers,
- read_draft_orders,
- read_order_edits,
- read_orders,
- read_third_party_fulfillment_orders,
- read_assigned_fulfillment_orders,
- read_merchant_managed_fulfillment_orders,
- read_products,
- read_content,
- read_fulfillments,
- read_custom_fulfillment_services,
- read_inventory,
- read_locations,
- read_markets_home,
- read_product_listings,
- read_publications,
- read_metaobject_definitions
- Click Save, then Install App
Step 4: Get Your Admin API Token
- In your Shopify dashboard, go to the API Credentials tab.
- Under Admin API Access Token, click Reveal token once.
- Copy the token and save it somewhere secure — you won’t be able to view it again after this step.
This token gives Asa access only to the specific data types you allowed in Step 3. Please store it securely — you’ll need it in the next step.

Step 5: Connect Shopify in Asa
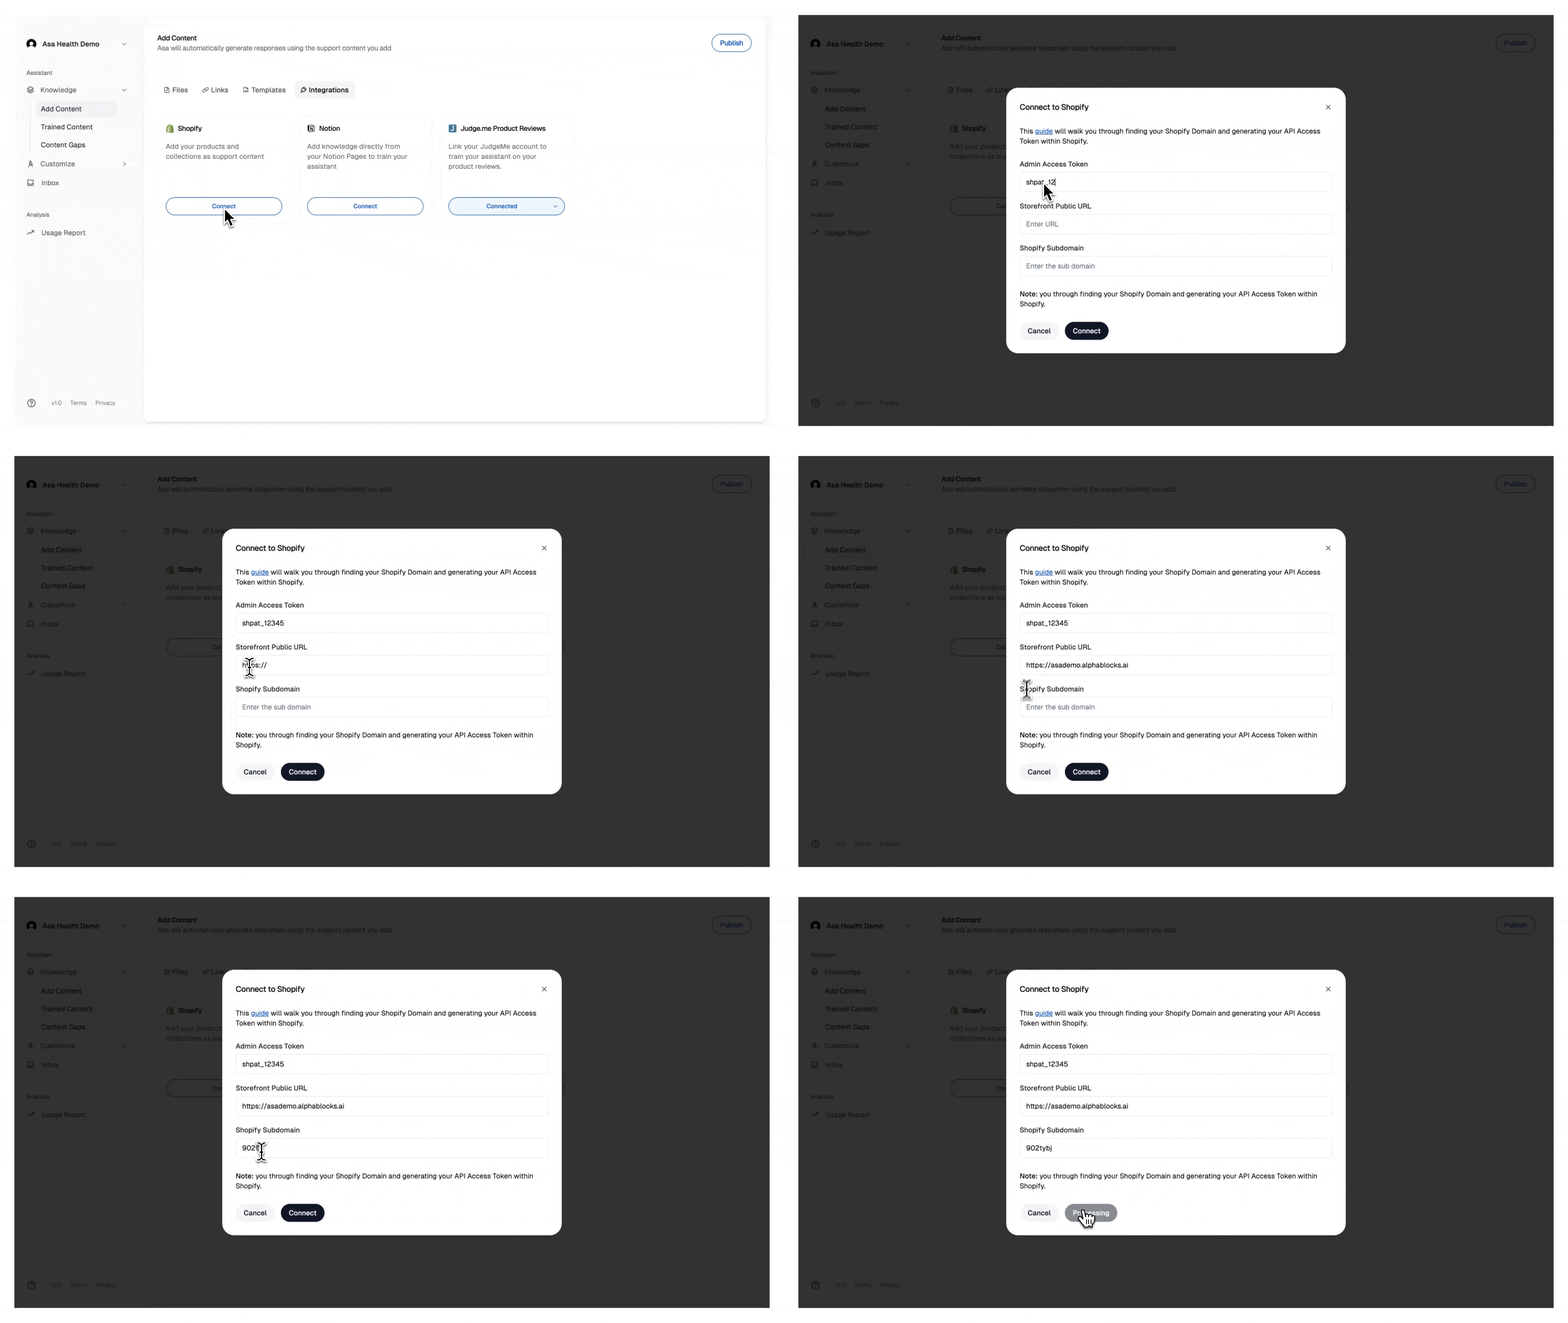
- In your Asa dashboard, go to Add Content, open the Integrations tab, and click Connect under Shopify.
- You’ll be asked to enter the following details:
- Admin API Access Token:
- Storefront Public URL:
- Shopify Subdomain:
Paste the token you saved from Step 4.
This is your live store URL — for example:
https://example.com or https://acme.com.
In Shopify, go to Settings > Domains and find the domain that ends in .myshopify.com.
If your admin URL is:
https://admin.shopify.com/store/acme/settings/domains
Then your subdomain is: acme.
Make sure all fields are filled in accurately before clicking Connect to complete the setup.

Step 6: Select Content and Train
- After connecting, a dialog will open to select products, blogs, pages, or policies
- If it doesn’t appear, click the (:list-plus:) icon next to Connected under Shopify
- Choose the content you want Asa to learn from and click Add Content
Training usually takes a couple of minutes.
To verify everything is working, go to Manage Content > Integrations and check the training status of the selected items.

Notes
- Use the (
 ) icon next to Shopify to add more content or retrain updated items anytime
 - You must have the right permissions to create custom apps in Shopify
- For secure setup, only the scopes you selected are accessed by Asa — nothing more
If you need help, reach out to us at help@alphablocks.ai — we’re happy to assist.